KEVINS OFFRAOD
XJ/ZJ
Track Bar Conversion
Fight back
against DEATH WOBBLE and GAIN ARTICULATION at the same time!
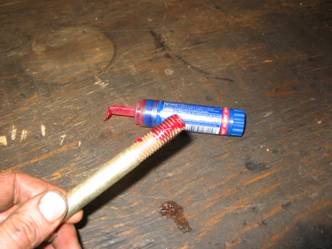
How much time will this take? Under an hour.
How difficult is this modification? 3 on a scale of 1 to 10.
What tools do I
need? Only a socket set, a drill with a 1/2" bit, and a torque
wrench.
|
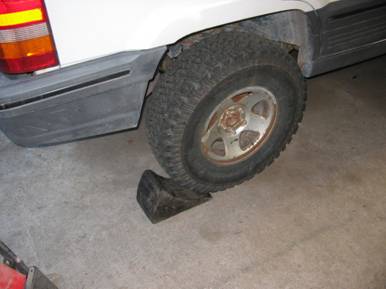
Before
jacking up the front end of the vehicle, you should always set a block or
brick against the back tire. This will
stop the vehicle from rolling. |
|
|
|
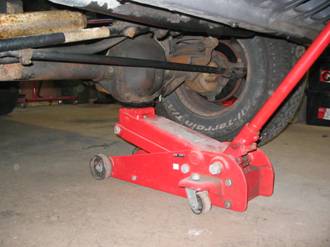
Use a floor jack to raise the
front of the jeep. I commonly use a
three ton jack for this, it has always worked great! |
|
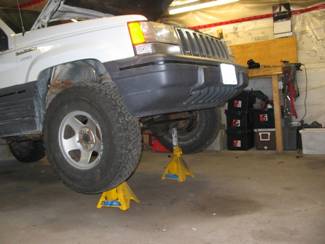
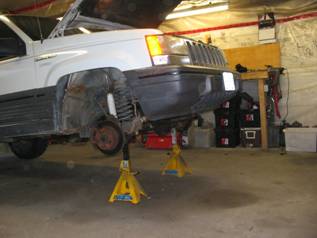
Once the
vehicle has been lifted to a comfortable height. Place jack stands under the axle and be
sure that they are secure. |
|
|
|
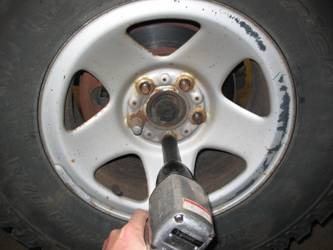
Undo the lug nuts and remove the
rims and tires. |
|
I like
to get everything out of the way and clear of clutter. This makes for a great working environment
and easily accessible for light. |
|
|
|
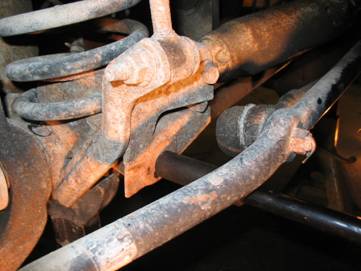
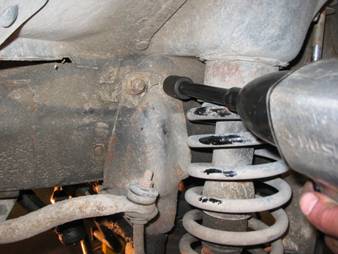
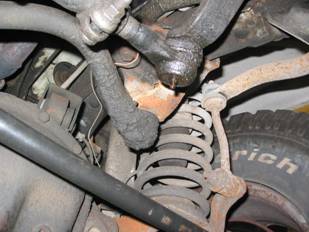
Unbolt the stock Track bar at its lowest
point first. |
|
Once the
bolt is removed, use a pry bar to separate the stock track bar from the
bracket. |
|

|
|
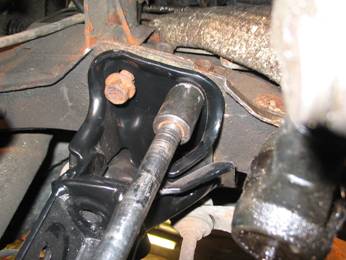
Remove the bolts at the bottom of
the frame rail first. |
|
Then the
two bolts on the outside of the frame rail.
Be sure to not lose the bolt-plate that comes in from the other side
of the frame rail...it will fall inside the steering gear heat shield above
the frame rail on the ZJ, making your life more difficult because you'll have
to remove the heat shield to get it back again. |
|
|
|
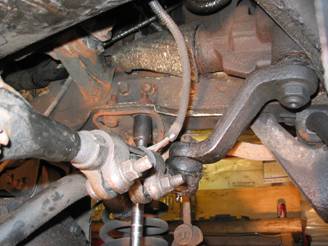
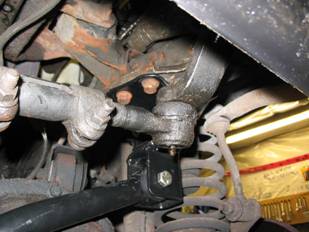
Now that you have the stock track
bar out, compare it to Kevins Offroad track bar. Notice the difference in quality and how
the track bar will now pivot on the bracket where the tie rod style stock one
restricts. |

|
Bolt the
new track bar back into place starting with the lower frame rail bolts. |
|
|
|
Then follow through with the outer
frame rail bolts. |

|
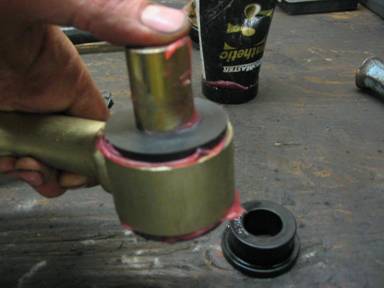
When assembling the trackbar itself, lubricate the bushings with poly-urethane lubricant, which is mineral based rather than oil based grease. Normal oil based grease will degrade the poly bushing over time.
Once completed wipe off the excess. |
|
|
|
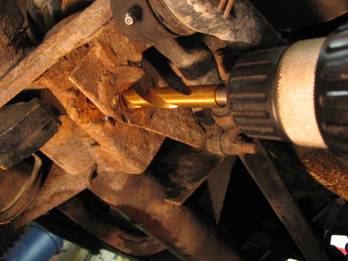
On the lower track bar bracket,
drill out the factory hole with a ½” bit. This will accommodate for the heavier bolts
that are supplied with the kit. |
|
Be sure
to use lock tite on all the threads, this will ensure they do not come loose. |
|
|
|
After aligning the vehicle over
the axle (possibly using a ratchet strap) adjust the track bar and bolt up
both ends using the upgraded hardware.
Tighten both ends of the trackbar to 90 ft lbs, of course using lock
tite. |

|
Here is
the finished product all bolted in!!
Looks great!!! |
|

Before....
After...
|
|
|
|
Jeep Specs |
Retail Resources |
Skid Plate Information |
|
1993 Grand Cherokee Engine: 4.0 Transmission: AW4 Axles: Dana 30/35 |
|
KOR product and design Powder Coated Black Part#
KOR 9001 |
Stay Tuned for our Product Review......
Write up By Nutzanboltz